
Quick Summary
Roof leaks frequently channel water into ceiling cavities and structural framing, creating favorable conditions for hidden mold growth within 24 to 48 hours even when surfaces look dry. Eliminating roof leak mold requires a systematic process of negative-air containment, thermal moisture mapping, saturated material removal, and targeted structural drying supported by Wade's Restoration. Readers will understand how to locate hidden moisture pathways, document losses for insurance claims, and contact Wade's Restoration for 24/7 emergency moisture mapping and certified mold remediation.
Roof Leak Mold: Steps to Address Hidden Moisture and Mold
When dealing with roof leak mold, time is an important factor. Water rarely stays where you see it. It seeps past shingles, runs along rafters, and settles into ceiling joists and wall cavities. Left alone, that trapped dampness can create conditions favorable to fungal growth inside structural framing, though moisture does not guarantee mold growth. While national housing data, such as the 2001 American Housing Survey cited by HUD, showed that 6.1% of occupied U.S. homes experienced a roof leak within a twelve-month window, these general surveys track water intrusion rather than mold directly. A dry-looking ceiling surface does not necessarily mean the framing above it is dry.[2]
Targeted structural drying and diagnostic assessment from specialists like Wade’s Restoration help identify hidden moisture pathways. Technicians use moisture detection and controlled drying systems to inspect and address building materials, identifying moisture boundaries before dampness spreads. See also Basement Flood Cleanup | Call Now-10% Off | Same-Day Service | Free Estimate.
What You’ll Need: Equipment for Roof Leak Mold Mitigation
Remediating mold after a roof leak involves containment, HEPA air filtration, moisture diagnostics, and protective equipment. Repairing exterior shingles or flashing while leaving damp framing sealed inside can create an enclosed microclimate where mold can begin growing within 24 to 48 hours under suitable conditions, depending on moisture, temperature, and material conditions.
Personal Protective Equipment (PPE)
Recommended protective equipment during an inspection or cleanup includes:
- Respiratory Protection: NIOSH-approved N95 or P100 half-face respirators fitted with particulate filters.
- Eye and Skin Barrier: Unvented safety goggles, heavy nitrile gloves, and protective coveralls.
Moisture Detection and Containment Tools
Identifying water pathways and managing spore movement typically utilizes restoration equipment:
- Diagnostic Moisture Mapping: Thermal imaging cameras, pinless meters for non-invasive surface scans, and deep-wall pin probes for framing lumber.
- Physical Containment: Polyethylene sheeting, tension poles, and zippered entryways to isolate the affected room.
- Drying and Air Cleaning Systems: Commercial HEPA air scrubbers, air movers, and dehumidifiers designed to remove moisture from structural materials.
Step 1: Identify Infiltration and Stop Active Water Intrusion
Step 1: Identify Infiltration and Stop Active Water Intrusion in brief: Water often enters through worn flashing or damaged shingles, running along framing before pooling over ceilings. Immediate tarping halts incoming rain, while thermal scanning traces migration paths to mitigate conditions favorable to mold growth, which can begin within 24 to 48 hours under suitable conditions.[3]
Tracing Attic and Roof Ingress Points
Water obeys gravity and surface tension, which means a stain on a ceiling is rarely located directly below the exterior roof puncture. Water often enters around a chimney collar, vent stack, or parapet wall, flows along framing, and drips down once it meets a joint or obstruction.
- Track the structural framing: Inspect attic rafters, collar ties, and top plates uphill from visible ceiling spots to identify the entry area.
- Secure exterior protection: Emergency tarping stops active infiltration before water further penetrates ceiling assemblies.
Assessing the Timeline of Microbial Growth
How quickly can mold grow after a roof leak? Under suitable conditions, mold can begin growing within 24 to 48 hours, dependent on moisture, temperature, and material conditions. Research compiled by Lawrence Berkeley National Laboratory shows that water intrusion is a primary driver of indoor biological growth, though moisture creates conditions favorable to mold without guaranteeing that every leak results in growth. Prompt water extraction stops moisture accumulation, protecting plaster and floor joists.
Step 2: Map Hidden Moisture in Ceilings, Joists, and Insulation
A water stain shows only the point of surface saturation. Moisture mapping reveals where water may be present inside structural cavities. Because national housing studies report water leaks and mold prevalence as separate statistics, direct physical testing provides actionable information.
Thermal Imaging and Pinless Moisture Readings
A multi-study review by Lawrence Berkeley National Laboratory noted that dampness or mold prevalence is a population-weighted average of roughly 47% across multiple studied buildings, rather than a current annual estimate or single national survey. Technicians at Wade’s Restoration use thermal cameras to identify temperature differentials caused by evaporation, followed by calibrated pin and pinless meters to evaluate moisture levels inside wood and plaster.[1]
Inspecting Prewar Plaster vs. Modern Drywall
Building materials respond to roof leaks differently, which informs the remediation approach:
| Material | Diagnostic Approach |
|---|---|
| Plaster and Lath | Thermal scanning, pin probe tests through lath gaps, and inspections from attic access points. |
| Modern Drywall | Pinless surface meters, relative humidity probes, and targeted inspection openings. |
Step 3: Establish Containment and HEPA Air Scrubbing
Isolating the work area before opening water-damaged assemblies helps limit the spread of airborne dust and mold spores into adjacent living spaces, air ducts, and shared hallways.
Sealing Doorways and HVAC Ducts
Containment barriers can be built using polyethylene sheeting and support poles around the work area. Sealing supply vents, return grilles, and doorways helps prevent airborne particulates from circulating into adjacent areas during material removal.
Deploying Negative Air Pressure Systems
- Position the HEPA Air Scrubber: Place an air scrubber inside the containment zone to filter airborne particulates.
- Duct Air to the Exterior: Run ducting from the scrubber exhaust to the exterior to maintain negative air pressure, drawing air into the workspace and venting filtered air outside.
- Verify Airflow Dynamics: Check containment barriers to confirm negative pressure is maintained throughout the work.
Step 4: Remove Saturated Drywall and Remediate Structural Joists
Addressing ceiling moisture from a roof leak involves removing damaged porous materials and drying the remaining framing timbers.
Controlled Removal and Material Cleaning
Water-damaged drywall and saturated insulation are typically removed when affected by mold growth:
- Cut away affected drywall beyond the visible moisture and mold boundary under containment.
- Bag damp insulation in sealed bags before transporting it through the building.
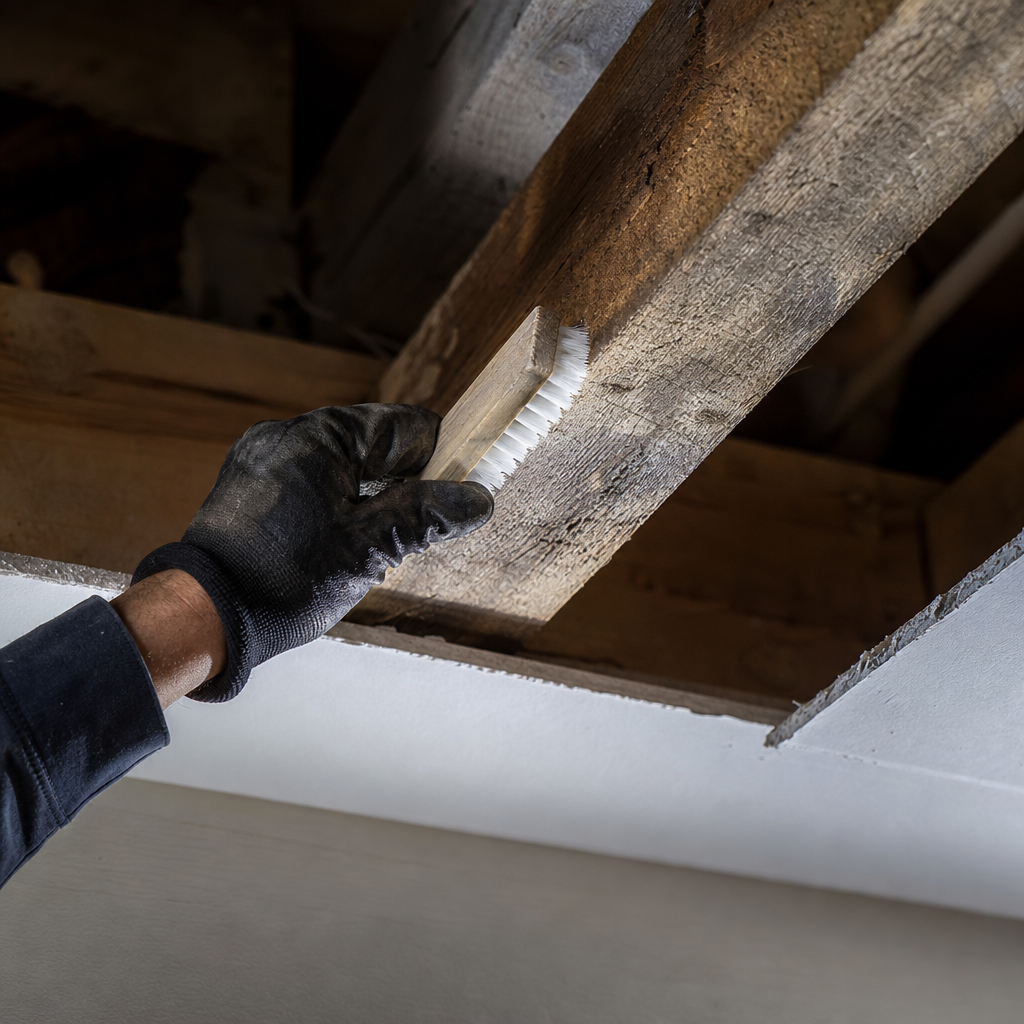
- HEPA vacuum exposed roof decking, joists, and rafters to remove surface debris and spores.
Cleaning Exposed Framing
After mechanical vacuuming, exposed framing is cleaned to prepare the wood for structural dehumidification.
Step 5: Dry Cavities to Prevent Trapped Moisture
When an exterior roof deck is repaired without addressing moisture inside the framing cavity, dampness can remain trapped inside the enclosed space. Trapped dampness can create conditions favorable to mold growth over time.[5]
Addressing Trapped Moisture After Roof Repairs
In one 2022 study of buildings where mold proliferation was identified, 72% of cases were attributed to water infiltration, with roof or wall leaks identified as the leading form of water infiltration among the building defects examined in that study. Ensuring cavities are opened and dried prevents enclosed moisture pockets from fostering microbial growth.[4]
Structural Dehumidification
Addressing structural moisture involves focused drying:
- Direct air movers across joist bays to increase surface evaporation.
- Operate dehumidifiers to remove water vapor from the air and draw moisture from structural framing.
- Monitor daily moisture content readings until framing materials reach dry baseline levels.
Step 6: Insurance Documentation and Records
Detailed technical documentation helps when assessing coverage under property insurance policies for water and mold damage.
Documenting Water Damage
Date-stamped moisture readings, infrared scans, and mitigation logs establish the timeline of events and show the steps taken to address water intrusion.
Adjuster Documentation and Moisture Logs
Documentation packages often include:
- Drying Logs: Daily records documenting ambient temperature, relative humidity, and moisture readings in framing lumber.
- Thermal and Photographic Records: Standard and thermal photos showing the extent of moisture migration.
- Detailed Scopes of Work: Itemized descriptions of drying and remediation procedures performed.
Frequently Asked Questions About Roof Leak Mold
How quickly can mold grow after a ceiling water leak?
Under suitable conditions, mold can begin growing within 24 to 48 hours, dependent on moisture, temperature, and material conditions. Rapid water extraction and dehumidification help prevent conditions favorable to growth.
Can a leaky roof lead to mold in an attic?
Yes. When roof leaks allow organic materials to remain damp in unventilated attic spaces, mold species can develop. Proper containment and filtration are recommended during cleanup to keep spores from spreading into living spaces.
Does homeowners insurance cover mold remediation from a roof leak?
Coverage depends on the specific policy terms and whether the leak was caused by a sudden, covered event. Maintaining detailed drying logs and photographic evidence, a standard practice at Wade’s Restoration, helps support the claims process.
Sources
- A State-of-the-Science Review of the Effect of Damp – PMC – NIH – pmc.ncbi.nlm.nih.gov (2023)
- Report to Congress on Mold and Moisture – archives.hud.gov (2001)
- Prevalence of Building Dampness – Indoor Air – iaqscience.lbl.gov (2009)
- NIOSH Dampness and Mold Assessment Tool (DMAT): Documentation and Data Analysis of Dampness and Mold-Related Damage in Buildings and Its Application – stacks.cdc.gov (2019)
- Dampness and Mold | Indoor Air – iaqscience.lbl.gov
Related reading: Pipe Burst Water Damage – Call Now-10% Off – On-Site in 60 Minutes – Free Estimate
Related reading: Burst Pipe Cleanup – 10% Off & Free Estimate – On-Site in 60 Minutes
Related reading: Flooded Basement Water Removal – Call Now-10% Off – Same-Day Service – Free Estimate
Frequently Asked Questions
How can I tell if mold is growing inside my ceiling after a roof leak?
Hidden mold often produces persistent musty odors, drywall warping, or peeling paint even when surface stains appear dry. Wade's Restoration uses thermal imaging cameras and deep-wall moisture meters to detect trapped dampness and active fungal growth inside ceiling cavities without unnecessary demolition.
Can I simply paint over a water stain on my ceiling after repairing a roof leak?
Painting over a water stain traps residual moisture inside the cavity, accelerating structural rot and concealed mold growth. Contaminated drywall and damp insulation must be removed, and structural joists must be completely dried before cosmetic repairs are made. Wade's Restoration isolates affected areas with HEPA containment to safely remove compromised materials.
What immediate steps should I take to prevent roof leak mold before professionals arrive?
Safely place containers under active drips, move furniture away from damp areas, and arrange emergency tarping to stop further water intrusion. Avoid running central HVAC systems, which can circulate airborne spores throughout the property. Calling Wade's Restoration's 24/7 dispatch line ensures technicians can begin diagnostic moisture mapping and containment within the critical 24 to 48-hour window.
About the author
 |
David Thorne David Thorne is a certified restoration professional with over 12 years of experience in the property damage industry. Holding a degree in Construction Management from the New York Institute of Technology, he specializes in structural drying and mold remediation. David’s extensive background in managing both residential and commercial losses ensures practical, actionable advice for property owners navigating unexpected disasters. |
Water damage, flood, or mold emergency?
We’re available now - call for a fast, free estimate.
Call Now - Free Estimate